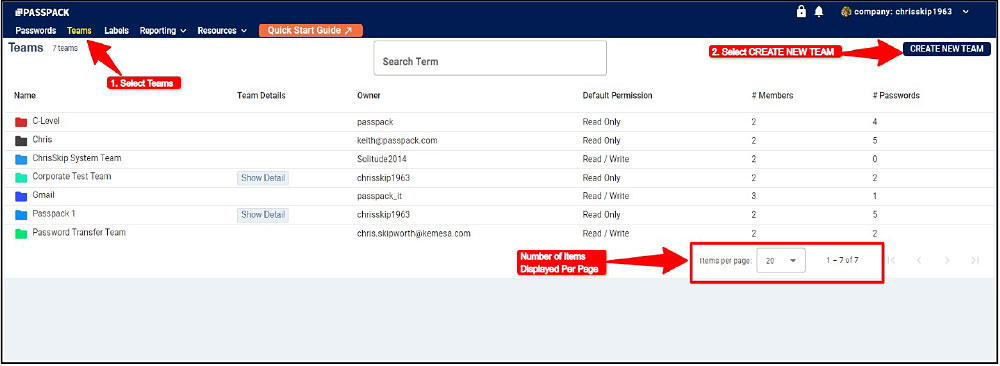
Select the Teams menu heading located at the top left. If you have some Teams already configured, they will be displayed in a list. During the initial setup, the list will be empty. Proceed and select “CREATE NEW TEAM” at the top right.
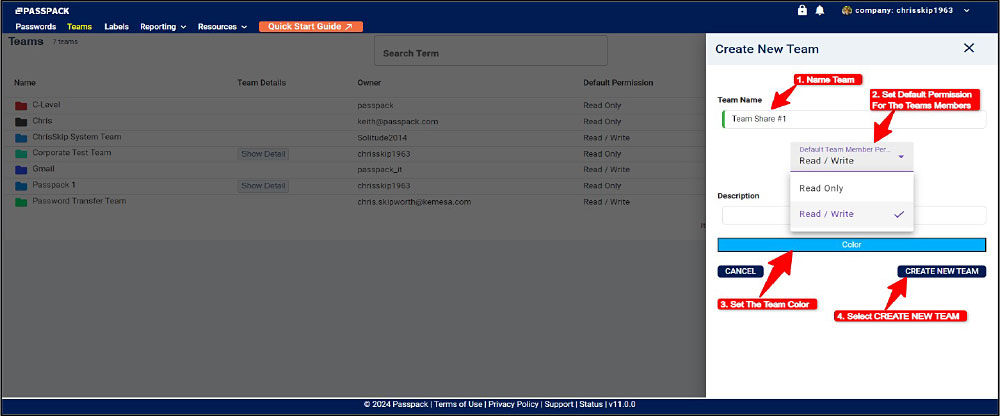
Once “CREATE NEW TEAM” is selected, the window below will be displayed on the right side.
Please follow these instructions:
- Name the Team.
- Set the Default Permission for the Team Members: Read-Only or Read/Write.
- Set Color for the Team.
- Ensure that “CREATE NEW TEAM” is selected to complete the operation.
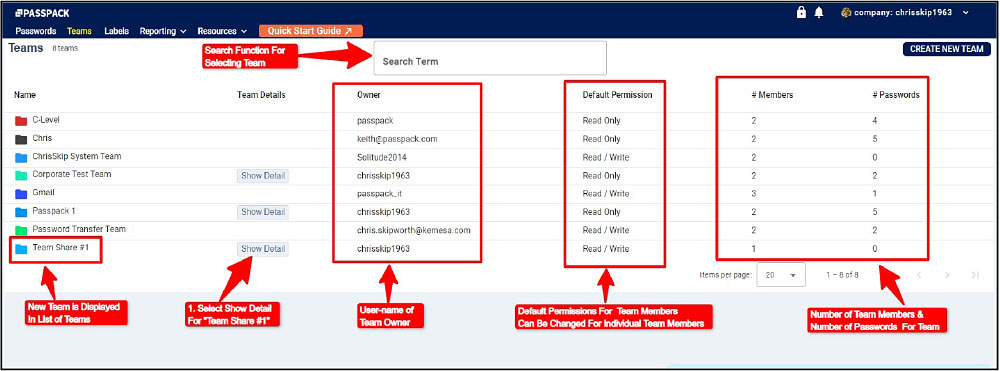
After the “CREATE NEW TEAM” function has been completed, the New Team Name will appear in a list on the left-hand side. Relevant information about the Team will be displayed.
- The Team owner can modify and update the Team settings by selecting “Show Detail.”
- Team Default Permissions are:
– Read-Only: Only the Team Owner can change the Password
– Read/Write: All Team Members can update the Password - The number of Team Members and number of Passwords for each Team is displayed.
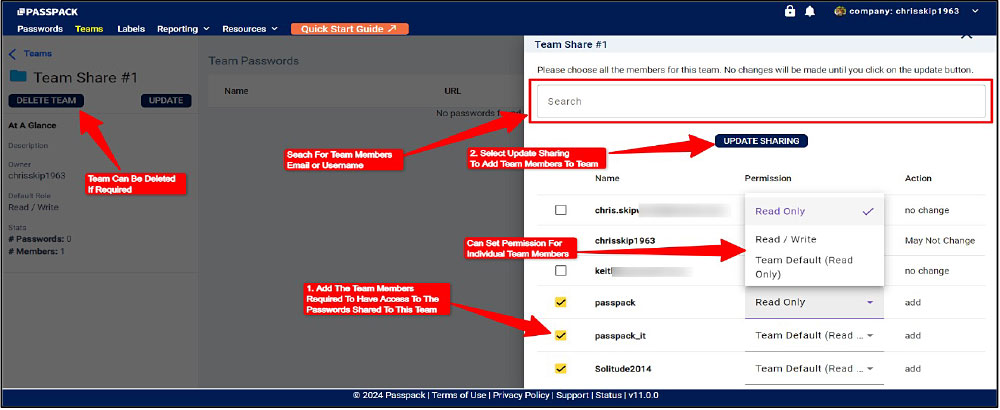
Select “Show Detail” to add the Team Members to the Team you invited.
Searching for Team Members
Quickly search for Team Members you wish to add to the Team. Add Team Members by selecting the box next to the Invited Team Member’s username. If required, it is possible to set Read and Read/Write permission on an individual Team Member basis. Be sure to select “UPDATE SHARING” to complete the operation.